 (资料图)
(资料图)
现在无线上网越来越方便,很多人都会利用笔记本来创建wifi网卡供自己的智能手机上网,节省流量,但是并不是所有的用户都知道如何操作笔记本设置wifi共享的。针对这个问题,小编就来给大家讲讲笔记本设置wifi共享的操作步骤。
笔记本如何设置wifi共享
打开电脑系统设置,找到“网络与Internet”选项。
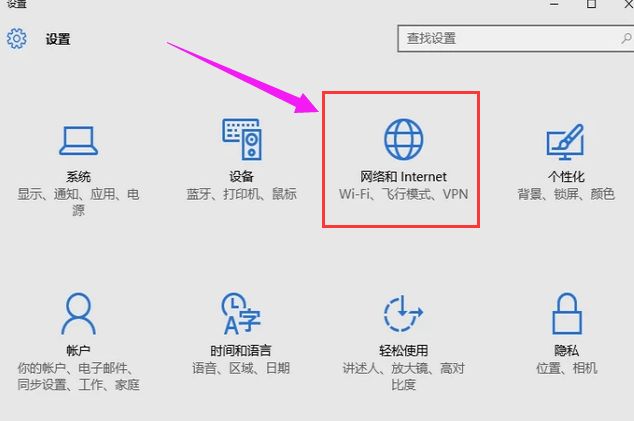
点击“网络与Internet”,找到“网络与共享中心”选项。
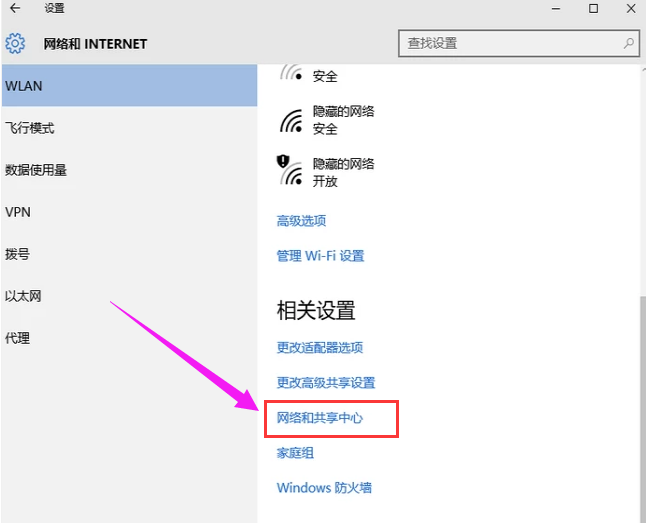
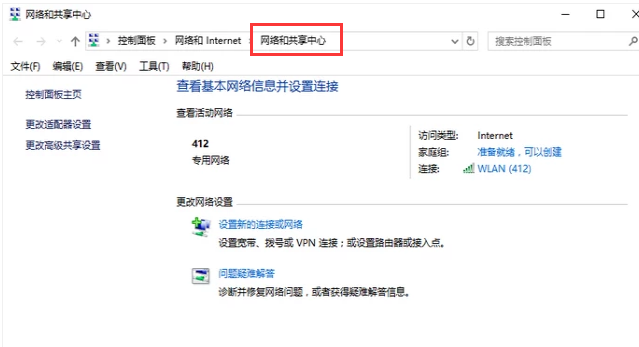
点击“网络与共享中心”,找到更改适配器设置。
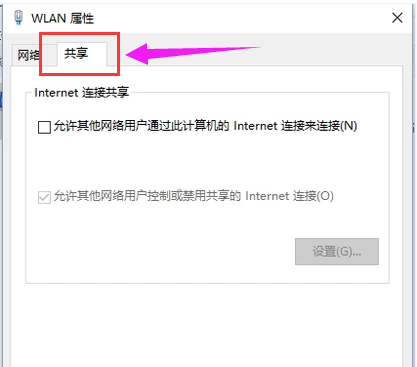
点击本地的网络连接。
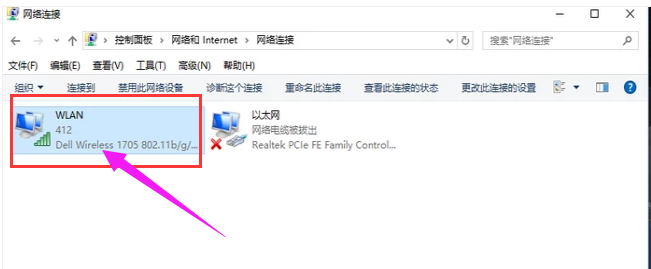
点击“共享”,允许其他设备连接,我们的手机就可以连接无线网络了。
以上就是笔记本设置wifi共享的操作流程了。